How to compare two 3D entities
Load data
Open the two 3D entities you want to compare with the « File/Open » menu entry ![]() .
.
These two entities can be:
- 2 point clouds
- 2 models (triangular meshes only - see supported formats)
- or one of each
Data preparation
Scaling the entities
(if the two entities have already the same scale you can skip this step)
- first choose an accurate element, visible in the two entities: edge, cornice, line or any other rectilinear element. If you can't find such an element, then choose two specific points/vertices clearly visible in the two entities: crossing of two lines or curves, corner, etc.
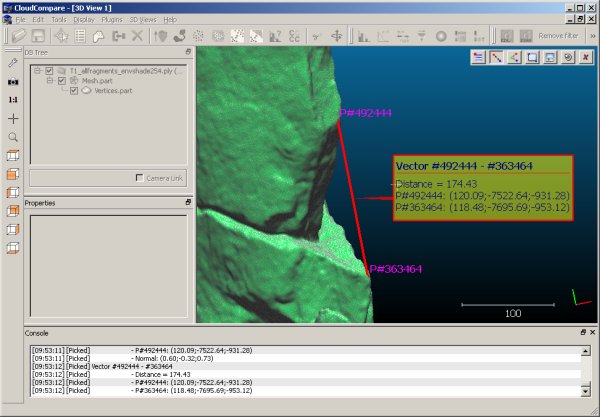
- then measure the length of this element (or the distance between the two specific points) on the entity with the larger scale. To do this launch use the Point picking
 tool.
tool.
Note: if you work with a model (mesh), you'll have first to make its vertices visible (by enabling the 'vertices' entity in the database tree) or alternatively to sample points on the mesh - see last remark at the end of this tutorial.
- let's call the measured distance Dmax. Note it down (hint: it will also be displayed in the Console window or you can also save the corresponding label).
- repeat the process on the other entity (i.e. the one with the smaller scale). Let's call the resulting distance Dmin.
- compute the scaling factor Sf = Dmax / Dmin
- eventually apply this scaling factor on the smaller entity with the 'Edit > Multiply/Scale' tool (use the Sf factor for all dimensions).
Note: conversely, you can scale-down the model with the larger scale by applying the inverse factor on it.
Roughly registering the entities
(you can skip this step if the two models are already roughly registered)
- first, if the entities are far apart, select both of them and use the 'Tools > Registration > Match bounding box centers' method (to make their centers of gravity match).
- then select one of the two entities (ideally the one that should move)
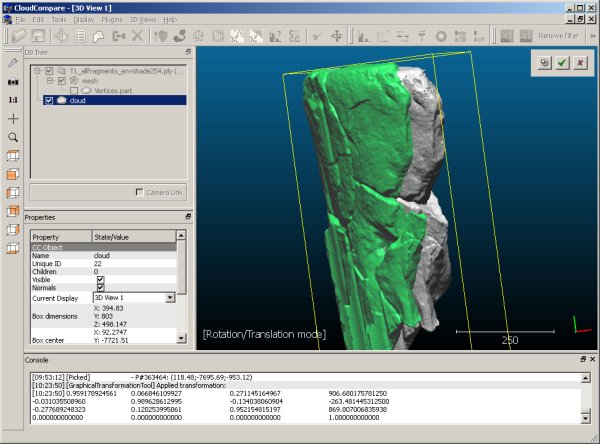
- eventually with the help of Interactive Transformation Tool
 , you can interactively rotate and translate the entity so as to (roughly) superimpose both entities.
Finely registering the entities
(you can skip this step if the two entities are already finely registered)
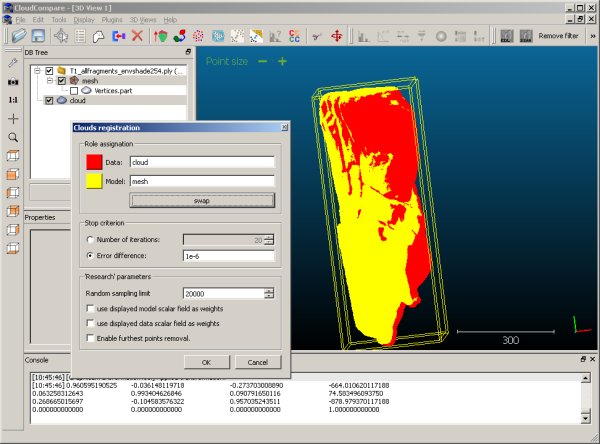
- refine and finish the registration of the two entities with at least the Align (point pairs picking)
 tool and ideally the Fine registration (ICP)
  tool.
tool.
Data comparison
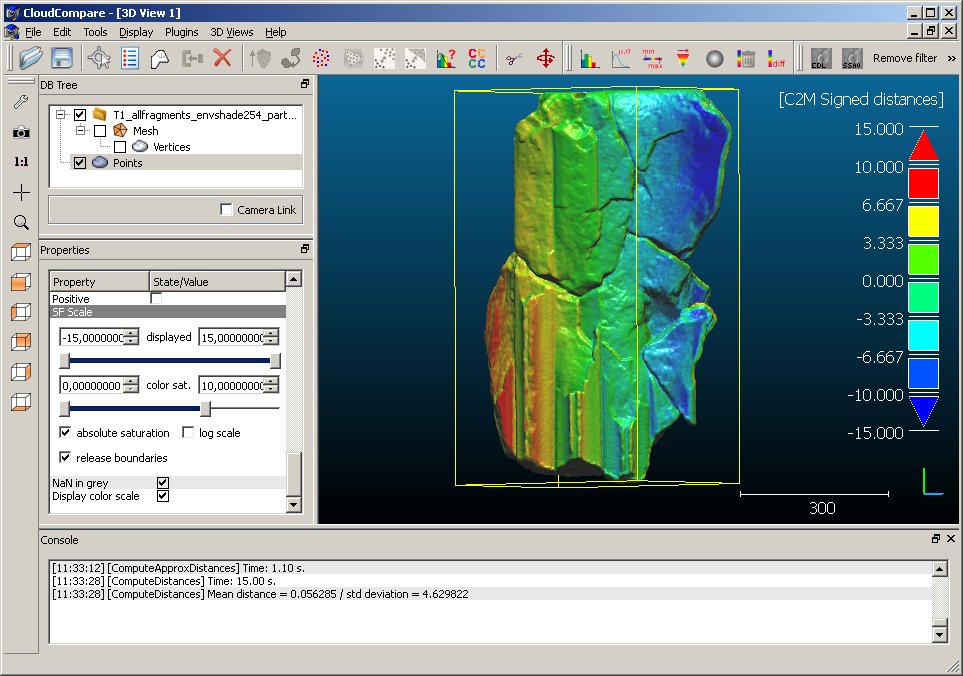
You can now compute the distances between the two entities.
Select both of them and choose the appropriate distance computation tool:
- for cloud/cloud comparison, use the Cloud-to-Cloud_Distance
 tool
tool
- for cloud/model comparison, use the Cloud-to-Mesh Distance
 tool. Warning: in this case the model will always be considered as the 'Reference' by CloudCompare. If you want to use the model as the 'compared' entity, you'll have either to select its vertices - if they are dense enough - or sample points on the model as suggested at the end of this tutorial. Eventually you'll have to perform a cloud/cloud comparison (see above).
- for model/model comparison, use the Cloud-to-Mesh Distance
 tool as well. Warning: in this case CloudCompare will only use the vertices of the 'Compared' mesh. If they are too sparse, you can also sample points on the model as suggested at the end of this tutorial.
Note: depending on the size of the entities and their spatial extents, this process can take from a few seconds to... a much longer time. To optimize the process, try to avoid as much as possible large non-overlapping areas (you can manually segment the entities with the Interactive Segmentation Tool ![]() ).
).
Once the computation is done, the color scale can be adjusted in the Properties of the compared entity so as to display the results in a better way.
Dealing with sparse mesh vertices
If the compared entity is a mesh, CloudCompare will only compute the distances from its vertices to the reference entity.
If those vertices are too sparse (i.e. with a too low density), you may want to sample points on the mesh first (with a high sampling density). To do this, use the 'Edit > Mesh > Sample points' ![]() tool. Then use the resulting cloud as 'compared' entity instead of the original model.
tool. Then use the resulting cloud as 'compared' entity instead of the original model.


