Extract Sections
Menu / Icon
This tool is accessible via the ![]() icon the upper main toolbar or the 'Tools > Segmentation > Extract sections' menu.
icon the upper main toolbar or the 'Tools > Segmentation > Extract sections' menu.
Description
This tool allows the user to draw or import poylines on top of a point cloud so as to extract sections and profiles.
Procedure
Select one or more clouds then launch this tool.
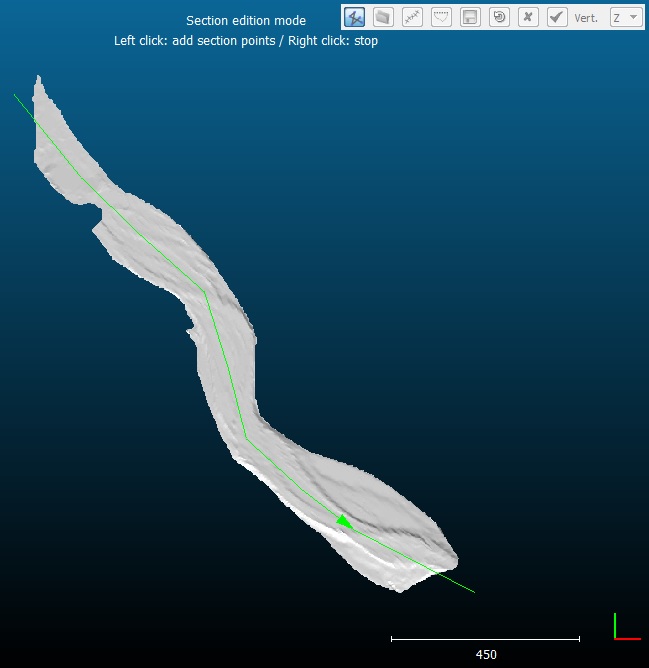
A dedicated 3D view will be created and a dialog will appear in the top-right area of this 3D view:
By default the tool starts in 'polyline edition' mode.
Note: the vertical direction is also set a 'Z' by default. This should be changed right away if the user wants to work with X or Y as vertical (in which case the 'polyline edition' mode must be deactivated first).
Polyline edition
At startup or when the user clicks on the ![]() icon, the 'polyline edition' mode is activated.
icon, the 'polyline edition' mode is activated.
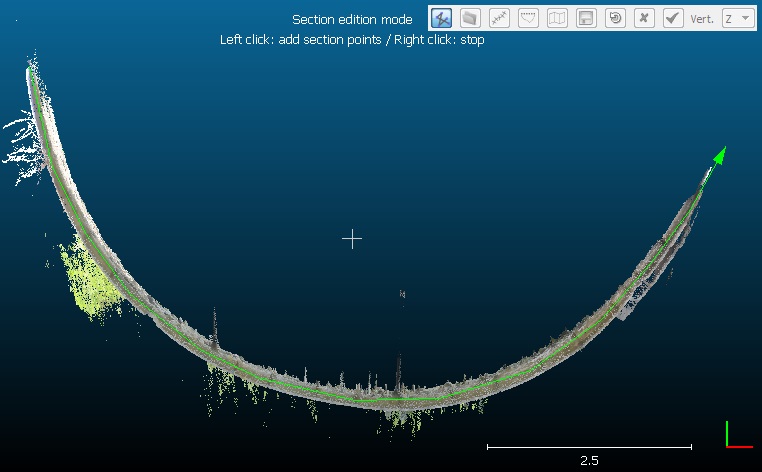
In this mode, the other icons are disabled. The user can only click on the 3D view so as to draw polylines:
- left click: create a new vertex (or start a new polyline the first time)
- right click: stop the current polyline edition
As with the Interactive Segmentation Tool, once a polyline is started, the next edge will 'follow' the mouse pointer. If the user clicks on the left mouse button the corresponding (end) vertex will be created and the edge will be 'fixed'. A new edge will be created from there. However if the user clicks on the right mouse button, the floating edge disappears and the current polyline edition is stopped. A new left click will start a new polyline. This way several polylines can be created in a row:
Once done, a second click on the ![]() icon will disable the 'polyline edition' mode. All other tools will then be accessible.
icon will disable the 'polyline edition' mode. All other tools will then be accessible.
Notes:
- during polyline edition, an arrow appears at the (end) tip. This is a way to recall that the vertex order may be important for some applications (e.g. when generating orthogonal sections along a path and then exporting the resulting profiles to Mascaret format for instance).
- you can't 'cancel' the last created polyline, but once you quit the 'polyline edition' mode it's possible to select a polyline and then delete it (with the 'Delete' key)
Polyline import
An alternative to polyline drawing is to import existing polylines. To do this, simply click on the ![]() icon.
icon.
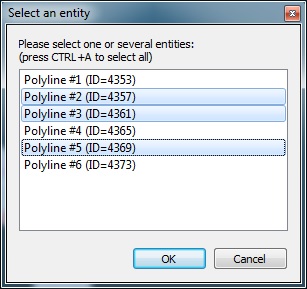
This will open a dialog with all the polylines already loaded in the DB tree:
You can select one or multiple polylines with the standard selection shortcuts (e.g. on Windows: CTRL or SHIFT key pressed for multiple selection, and CTRL+A to select all at one). The selected polylines will then be imported and displayed in the 3D view. Make sure the coordinates systems are concordant.
Orthogonal sections generation
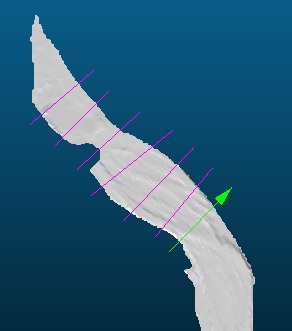
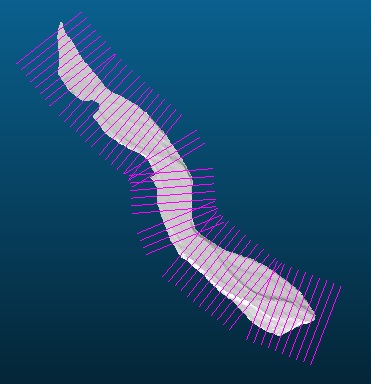
Instead of defining several orthogonal polylines/sections it may be faster to defined a single 'path' and automatically generate orthogonal sections with at regular intervals.
First the user needs to draw or import this 'path' and then select it by clicking on it (the 'polyline edition' mode must be disabled to select a polyline). A selected polyline appears in red. Note that when exiting the 'polyline edition' mode the latest drawn polyline will be automatically selected.
Once a polyline is selected, the ![]() icon can be clicked:
icon can be clicked:
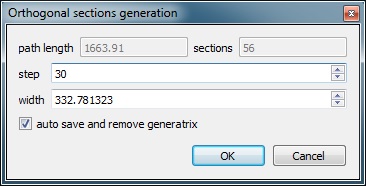
This dialog displays in the upper part the total length of the selected polyline/path as well as the number of orthogonal sections that will be created with the current settings.
The current settings are:
- the generation step (i.e. the distance along the path between two orthogonal sections)
- the orthogonal sections width
A last option named 'auto save and remove generatrix' will tell CloudCompare to remove the selected polyline/path from the active polylines after having saved it to the main DB tree. This is useful as afterwards the 'profile extraction' method will use all active sections and it is generally not interesting to generate a profile along the main path. However, in case the orthogonal sections generation settings were not correct, the user can still undo this, import the path from the DB tree (see above) and restart the process.
Generating cloud slices and profiles
Once one or several sections have been edited/imported/generated, the user can ask CloudCompare to extract the corresponding cloud slices and/or to generate polygonal profiles.
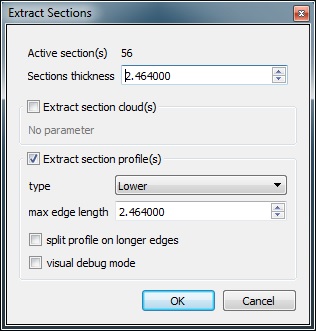
Click on the ![]() icon in order to make the following dialog appear:
icon in order to make the following dialog appear:
Warning: all the active polylines will be used.
The main parameter is the section virtual 'thickness'. For each section/polyline, CloudCompare will extract all the points within this thickness (in 2D). The thickness defined here is the total thickness (i.e. half of it on one side, and the other half on the other side).
Then the user can choose to generate the clouds corresponding to each section. Simply check the 'Extract section cloud(s)' option (no parameter).
The user can also choose to generate profiles. In this case check the 'Extract section profile(s)' option then set the following parameters:
- type: profiles can be of three types: Lower, Upper or Both. In effect, from each section cloud a 2D contour can be extracted (the same 'concave hull' algorithm as in the Cross Section tool is used). By default it's a closed contour. So the user has to choose if the 'profile' should be the lower part of this contour, or the upper part, or both (in which case the whole contour is extracted).
- max edge length: this is the main parameter of the 'concave hull' extraction algorithm. See the Cross Section tool documentation.
Additional options are:
- split profile on longer edges: it is possible to split the generated profiles/contours on edges that are longer than the specified 'max edge length'
- visual debug mode: for debug use (can be used to understand why the algorithm doesn't output what one would expect)
Notes:
- all section cloud(s) are stored in a default group named Extracted sections
- all section profiles(s) are stored in a default group named Extracted profiles
- if the 'multi-pass' option is checked, CC will attempt to subdivide again the bigger segments, in case the first pass has missed some complicated 'circonvolutions' in the contour. However it may not be always successful, and in some cases it can even create artifacts.
Unfolding a cloud along a polyline
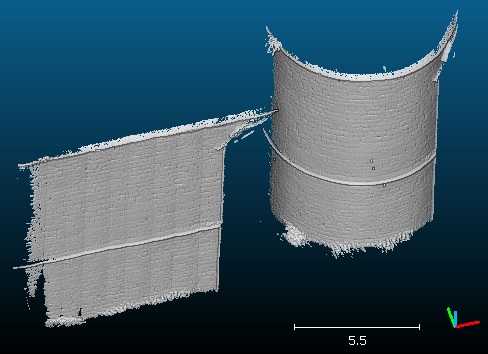
The active polyline (either created by the user or imported) can be used to unfold the cloud.
- Click on the
 icon.
icon. - CloudCompare will then ask for the maximum 'Distance to polyline' (points farther than this distance will be discarded)
- Eventually the cloud will be unfolded along the polylines segment.
The resulting cloud won't appear in the tool window. You have to close the 'Extract Sections' tool first.
Exporting the active sections/polylines
At any time the user can export all the generated or edited polylines to the main DB tree (so as to export them to a file, or simply to import them in this tool later). Use the ![]() icon to do this.
icon to do this.
Notes:
- the exporter is smart and will only export the polylines that were not already exported. This way this icon can be clicked several times without duplicating the polylines.
- all polylines are stored in a default group named Exported sections
Undo
An 'undo' icon ![]() can be used to 'undo' the previous operations. All polylines created during the last operation (polyline edition, import, orthogonal section generation, etc.) will be removed each time.
can be used to 'undo' the previous operations. All polylines created during the last operation (polyline edition, import, orthogonal section generation, etc.) will be removed each time.
Notes:
- CloudCompare will ask the user to confirm the undo operation each time (specifying the number of polylines that will be deleted this way)
- polylines previously exported to the DB tree will be removed from the 'active' polylines set in the tool, but they will remain in the DB tree
- the undo history will be lost if the user selects a single polyline and deletes it (with the 'Delete' key)
Stopping the tool
To leave the tool, the user has two choices:
